-------------------------
Date: January 27, 2010

I'm into free TV. One of my new favorite digital channels is a PBS channel called Create TV. It has craft, gardening, home improvement, cooking, and travel shows. I also enjoy watching this show on one of the other PBS channels – "Rare Visions and Roadside Revelations." It showcases outsider folk artists and their art, most of which is located along America's roadsides, hence the show's name. The saying about "beauty is in the eye of the beholder" illustrate the thriftiness and creativity of the folk artist.
Update: Now I'm into watching YouTube videos as well. I collected all the bits from past shows that I could find and made a playlist of them to link in above.
-------------------------
Date: February 24, 2010
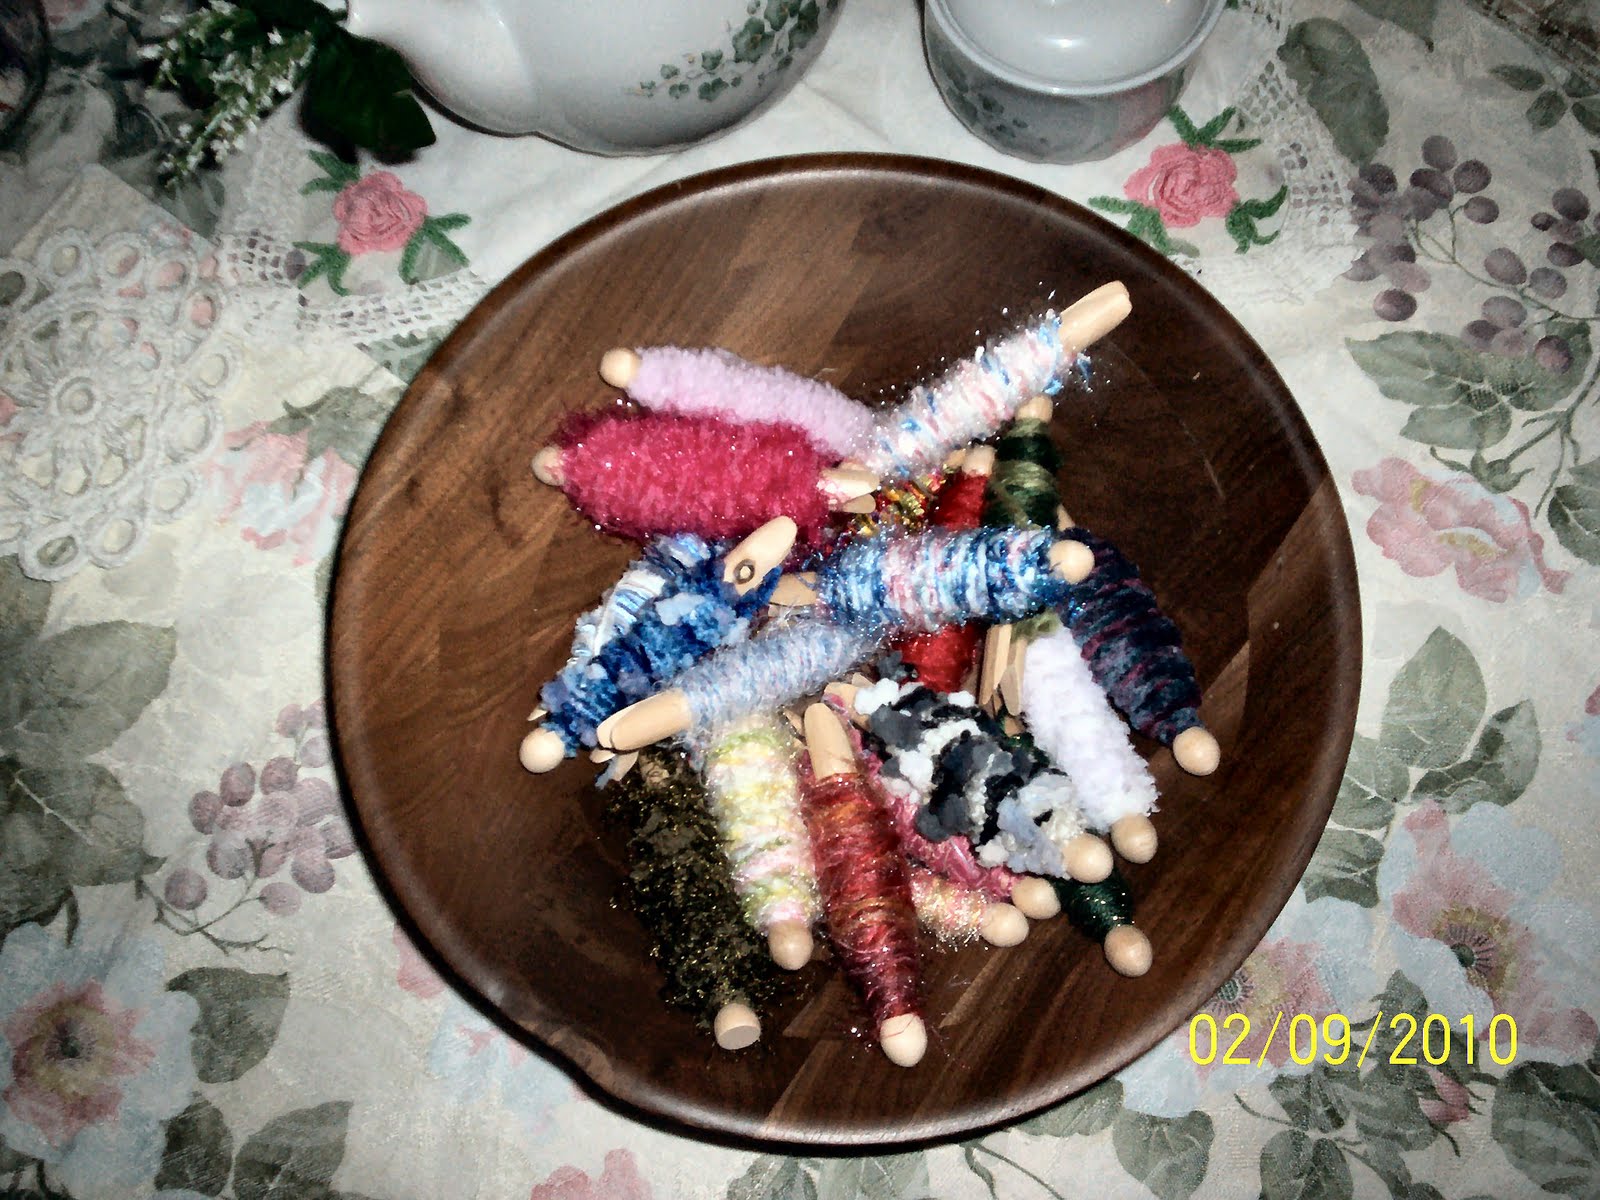
My girlfriends and I share a couple of yards of fibers with each other when we purchase new skeins for card & scrapbook projects. I also have collected several itty-bitty balls of yarn left over from crochet projects. Last fall, my mother, her girlfriends and I visited a country craft fair and in an antique shop at the local town, I saw a large pickle jar full of yarn & ribbon wrapped clothespins. They were also selling unwrapped clothespins for a dollar apiece. I came home, went to the dollar store, and purchased a package of 20 wooden clothespins for $1.00 and have all these lovelies. The wooden salad bowl came from a thrift/junk shop.
-------------------------Date: April 27, 2010

If you are going to a crafting session with your friends and need to take several spools of ribbon with you, a clean margarine tub with lid works great. I have a 15 ounce (425g) tub which holds 4 or 5 quarter-inch size spools quite nicely.
----------------------------
Date: June 30, 2010

I really like those fanny packs, only worn around in front. You know the kind that snaps around your waist and leaves your hands free, but all the essentials are there. As a BBW, it wasn't easy to find one with a belt long enough and when I finally found one, I eventually couldn't wear it because I developed a pinched nerve, caused by a spur, in my back & hip (later diagnosed as arthritis). So I had to resort to other measures. I don't like purses with dinky little handles and with my rolling shoulders, the longer straps would slide off, so I got to wearing them cross-body over my head across my chest with the purse hung up in the armpit area and choking off a boob when I had to have my hands free for shopping. Not a pretty sight mind you, nor very comfortable.
So I went shopping and found a purse with a handle that was adjustable at a garage sale (50 cents). The strap looked like a belt with a buckle which came apart. It only had one hole in the end, so I punched a couple more with my crop-a-dile hole punch. Still it wasn't long enough, so I went up to our local thrift store, found a small girl's belt for 99 cents, tried it to make sure it would slide through the buckle on my purse, cut off the end, added a few more holes and wha-la! I can wear my new purse in comfort on my hip where it belongs. Wow! Can't beat a new purse for $1.50!
So I went shopping and found a purse with a handle that was adjustable at a garage sale (50 cents). The strap looked like a belt with a buckle which came apart. It only had one hole in the end, so I punched a couple more with my crop-a-dile hole punch. Still it wasn't long enough, so I went up to our local thrift store, found a small girl's belt for 99 cents, tried it to make sure it would slide through the buckle on my purse, cut off the end, added a few more holes and wha-la! I can wear my new purse in comfort on my hip where it belongs. Wow! Can't beat a new purse for $1.50!
-------------------------

I picked up the Mid-Continent library system's community program catalog called "Beyond the Books" for the Fall season at my local branch. There are 30 branch libraries in the whole system. I see, for my local branch, there are several craft classes and clubs offered like a candy-making class for teens, craft classes for preschoolers, an interior design class on decorating for the fall, a KC Chiefs Face Painting class, a scrapbooking club that meets for two hours once a month, pumpkin carving for teens, and a quilting and knitting club.
Across the system, some of the most interesting craft classes are: Art, Illustration & Graphic Design Exhibit, beading, beginning tatting, brad bracelets, candy & cooking classes, cemetery art, crochet classes, a Dear Jane Quilt group, drawing, dry embossing, duct tape creations, face painting, finger painting, friendship bracelets, gingerbread houses, greeting cards & Kirigami greeting cards, making gum paste flowers for cakes, holiday crafts, home design, Japanese calligraphy, jewelry, journaling, Native American crafts, needlework classes, origami, ornaments, paint-by-gum, photo classes & club, plastic models, punch needle, sticky note airplanes, stitched tea towels, snowflake stitchery sampler, and wall decorations. For more information or to register for craft classes, see the website above or your library's website.
Across the system, some of the most interesting craft classes are: Art, Illustration & Graphic Design Exhibit, beading, beginning tatting, brad bracelets, candy & cooking classes, cemetery art, crochet classes, a Dear Jane Quilt group, drawing, dry embossing, duct tape creations, face painting, finger painting, friendship bracelets, gingerbread houses, greeting cards & Kirigami greeting cards, making gum paste flowers for cakes, holiday crafts, home design, Japanese calligraphy, jewelry, journaling, Native American crafts, needlework classes, origami, ornaments, paint-by-gum, photo classes & club, plastic models, punch needle, sticky note airplanes, stitched tea towels, snowflake stitchery sampler, and wall decorations. For more information or to register for craft classes, see the website above or your library's website.
If they don't offer classes like these, ask if you can begin a crafting class to start the ball rolling in your community. Set a date at the library, advertise by word of mouth and post signs where people congregate like the grocery store, library, gas station or in your local papers. Give the library a sign-up sheet and a supplies hand-out sheet. Don't be discouraged though if only about half that sign up show up. Just go and have fun and word of mouth will make your classes grow!
-------------------------
Date: June 25, 2011
Since I’m frugal, I didn’t want to spend a bunch of money for a Melting Hotpot that I might only use once, so I made my own version. I found this Dazey Beverage Warmer, still in the box like new, and the metal pitcher at the thrift store. My mother gave me a box of paraffin wax that had been in her canning pantry for several years to try first, but I had thought of purchasing old/used off-white or light yellow taper candles from the thrift store or melting down old yellow or tan crayons to get the look of expensive beeswax. I expect a candle warmer would work as well. It took a few minutes for one bar of the canning wax to melt down and when I was done playing, I removed the pitcher from the warmer to let the wax harden right in the pitcher. I didn’t see the need to remove it, so it will be there the next time I want to play again.
-------------------------
Date: June 29, 2011
Purchase 2 ounce clear cosmetic mister bottles from Walmart for as many colors as you think you will need. Next, fill them with water. Then add 30 drops of re-inker, shake it to mix and spray many backgrounds for your stash. Have fun playing and experiment with various color combinations. Spray through stencils too, for pretty designs!
In addition, make a spray paint “booth” out of a cardboard box (abt. 15 x 15 inches) by cutting off the flaps and lining the very back and bottom of the box with cereal wax paper so there isn't any accidental spray leakage from there to your work surface.
I recently saw a bottle of similar solution at a scrapbook store for $13.00.
-------------------------
Date: January 9, 2012

The sealing ring on the blender I use for making homemade paper came up missing recently. I looked up the appliance papers to see if I could order another one from the company, but drats, no phone number or address. I remember that the sealing ring was like a piece of flexible rubber, but what could I use to replace it? First, I tried making one from a plastic oatmeal canister lid, but it still leaked like a sieve. Rubber, rubber? What do I have at home that looks like rubber. Ahh! Fun Foam. Trace around the base of the blender jug without the cutting blades attached on both the plastic lid and fun foam and cut out. Stack both together, with the plastic ring next to the blender jug base and screw cutting blades on. Add water to the jug and viola, it should work like a dream.
I also thought that this might work for those of you who purchased an old blender for making paper from a thrift store or garage sale and found the sealing ring missing too.
-------------------------
Date: August 17, 2013

When I was in the hospital this summer, I received several small flower arrangements. They were so cute. And they were the ones to survive my husband's care the best when he took them home after I was transferred to another hospital because the flower's feet were still in water. Karen brought me a small flowering plant wrapped in red and blue tissue paper (edges of tissue paper were scalloped) and set into a red, white, and blue decorated box about the size of a cut down milk or juice carton with a ribbon handle. I thought what a handy idea -- easily made and festive for Independence Day! Another idea was a tiny small-necked bottle filled with water, a stargazer lily blossom, roses and baby's breath, wrapped in white tissue paper and inserted into a small gift bag. What a great idea for upcycling all those sample condiment bottles and spice jars I've seemed to have accumulated around my house! The gift sack could be one I craft from a brown lunch bag or one I have saved from a previous gift or failing that, a trip to the dollar store for one.
While convalescing at my mother's after the two week hospital stay, my hubbin surprised me with the newest issue (July 2013) of the now defunct :( Scrap & Stamp Arts magazine. Lo and behold, Karen had a card published in the Simple Stampin' Gallery (p. 34, Congrats! Karen). The article that caught me eye though was Carol Heppner's altered mini vases on page 14. Oh, another thing to collect! The flower I liked best was the folded rosette medallion made of text scrapbook paper just like the ones I made for my Sunday School kids Easter "baskets." Now that pink bathing tub I brought home from the hospital ought to just hold several of those small, skinny bottles like hot sauce bottles, salt & peppers, scented oil stick jars, old perfume bottles, vinegar decanters, and so forth.
-------------------------
Date: June 16, 2015

All the ladies at an ATC club that I began attending liked my sponge tool -- a wedge of round yellow clay sponge cut into quarters and "pinched" into a clothespin "handle." I have a hard time with "traveling" ink -- in other words, I would love to be a neat and tidy crafter, but to tell the truth I'm messy, so the clothespin helps keeps the ink off the ole fingers, however, the night before, I had purple ink on the back of my fore-arm, (aaak!) my pink shirt as well as on the table top that I believe had squirted out sideways from a re-inker bottle. I tried to wipe it all up but some of it started hitchhiking on me before I found it all! LOL!
-------------------------
Date: March 7, 2018

Date: March 7, 2018

My mother was a ceramic teacher for years and years and one tip she always told me concerning acrylic paint was -- if your paint is beginning to dry up (still gooey on the inside of the bottle under the skin that formed on top), is to remove the skin and toss it away and to add one capful of water to the paint bottle. Stir the water into the paint with a palette knife (or popsicle stick or bamboo skewer), screw the lid back on and store the bottle upside down, so that any air that happens to be inside the bottle will go up to the bottom and begin to dry out the paint there, instead of the paint near the lid which you want to keep in semi-liquid form.
However, if you find that your paint is completely hard as a rock all the way through the bottle when you try spearing it with a palette knife and it bounces back, then it is a goner and time to toss the bottle, cause you won't be able to resuscitate the paint. It is now a plastic brick! smile!
-------------------------Date: March 8, 2018

Once upon a time, I had a bone folder. But it grew legs and ran away, so now I use a brayer I found at a garage sale for a quarter. Not only does it make sharp creases, but also rolls out air bubbles from glued down or double-face taped images and sentiments.
And in a pinch, it has also doubled as "zoom, zoom car" when my girlfriend and I got together to make cards, as her young grandson enjoyed playing with it. smile! 🚗
-------------------------
Date: 15 July 2021


-------------------------