Showing posts with label Gift Idea. Show all posts

Wednesday, January 12, 2022

Happy Mail Opportunities!


Looking for opportunities to send a RAK (a random act of kindness) via snail happy mail? Below are listed some ideas for you. I get as much pleasure sending a card as receiving one and it doesn't matter to me whether I send or receive a card that's a commercially made or a handmade one, as it is the thought that counts, right

For instance, I make cards and have had some designs published, but if I'm shopping at our local Dollar Tree, where cards are sold for 50 cents and I see a design I like, I'm liable to send a few of those out too. 

  1. Are you catching events like anniversaries, baby and bridal showers, birthday, get well, graduation, holidays, sympathy, and weddings for your friends and family? Write the event down in your planner or on your calendar to help you remember to send them a card or letter. 
  2. Contact your favorite card or craft magazine and ask them if they have the address of a charity to donate cards to.  Or ask your favorite rubber stamp company if they know of one. Here are two called Letters of Love for the Elderly or Operation Christmas Cards for Our Troops .
  3. Send firefighters, your mayor and city council, police officers, or a soldier a thank you card for their service. 
  4. Send a letter to 12 people this year, one a month. Tell them you are grateful for the positive influence they have had on your life and be sure to tell them what it was. I once sent a card to a former teacher who I heard had been diagnosed with cancer. She wasn't one of my favorite teachers nor was I her student pet, but she did teach me how to type and I thanked her for teaching me that skill, for I am using it today as I type this post. 
  5. Mail a sunny physical card via snail mail to a neighbor on the right and to the left of your residence.
  6. If you are listed in a church or club organization directory, send a card to the people just above and below your name and address. 
  7. I once had the ladies in our church shower my mother with cards the day her birthday fell on a Sunday.
  8. Send a card to a secret sister or pal or send a handwritten paper letter to a pen-pal. 
  9. Send a decorated recipe index card to a friend's collection of recipes. Make it extra special by catering it to their dietary needs. 
  10. Surprise your boss and send a card to them. (or send one to a co-worker).  Praise them for a job well done! As the saying goes, catch them doing good! 
  11. A friend donates small cards to her local meal-on-wheels and nursing home. 
  12. Address a local picture postcard (or tourist brochure) to "You," slip it into a slightly larger food zipper baggie and tie or duct-tape it to a brightly colored helium-filled balloon. If you wish for a reply, slip a business card inside baggie with a post office box return mailing address.  Pray over your happy mail and send it on its way by letting it fly away. 
  13. Send a note-a-day of love to a friend who has just moved away for 30 days. I once did this for my BFF. She was a military wife and mother to several small children at the time. She said all those wonderful cards delighted her as she received them daily in the mail and she felt loved and less alone as she gazed on them scattered around her new home several states away. 
  14. Have a shoebox party (no. 2) and designate all or half the postcards made and signed to send to a city mission for the homeless or missionaries your church supports. Have the party attendees donate postage stamps along with their shoeboxes. 
  15. Send a thank you card to your custodian or maid service, daycare providers, dentist, doctor, dog groomer, hairdresser, your mail carrier, a nurse, your pastor, your Sunday School teacher and so on for their care of you. 
  16. Surprise a friend or family member and subscribe to an old-fashioned magazine for them. My sweet husband subscribed to the Country Sampler Farmhouse Magazine for me last year. I didn't know he had done so until I received the first issue. Then if you like the magazine, send a Letter to the Editor and include several of your favorite local shopping stores or mail-order catalogs in your town. I have had several of those published in various magazines over the years.
  17. A former pastor of ours had a signing party at church. Once a month, in place of a regular Sunday evening service, we gathered around tables in the fellowship hall instead of in the sanctuary. He brought a list of names/addresses, boxes of cards, pens and postage stamps; we brought snacks, and we signed and sealed cards to mail out to birthdays of the month, members who missed services, missionary links, shut-in's, visitors and anybody else that pastor believed needed some cheer that evening.  
~~ <> @ <> ~~
Any of the posts labeled "Card" here on my blog will give some ideas of card design, but I also have some favorite posts that accompanies this snail mail idea list, such as:

18. A cartoon about All Occasion Cards 🤓


21. A Doodled Zine 

22. Need some Sentiments for Cards? Here's some "Farm Animal Sayings for ATC's, Art Journaling Pages, Cards, and Scrapbooks" 

23. Or would you rather use a poem? I've got lots here at Splitcoast Stampers website in a forum thread called "Need a Poem?." 

24. We are a former homeschooling family. I created a unit study about the mail service for our son and along with it, he did a community service project at the same time. Here's the Paper Postcard Unit Study.

25. Quick Cards Designs


29.  I have a Happy Mail Playlist at YouTube. It contains videos of snail mail that I have sent to friends on YouTube. I enjoy making my friends happy and delight in watching their appreciation and joy for the goodies.  There are general hashtags on YouTube for happy mail also, such as this one -- #happymail  

~~ <> @ <> ~~
Not every card or letter will need inserts, but if you would like to add something extra special to one, here are several ideas for those. 

1. For instance, we know of a young single mom who was in a serious car accident last year. Her grandmother asked that we insert Walmart Gift Cards into our Get-Well cards.

2. I taught toddler and primary Sunday School for several years. I sent coloring cards to my students about once a month to once a quarter. My kids were tickled to receive happy mail sent to them in care of their parents and sometimes I inserted small gifts such as artist trading cards, commercially printed Bible scripture trading cards, bookmarks, coloring sheets, coupons for food treats, church business card magnets, SS class photos, seed packets, sticks of gum, etc. 

3. A nice monetary tip (15% of your total bill is customary) for your waiter or waitress.

I invite you to add any ideas that I haven't thought of as yet in the comments below. As the Bible says, it is more blessed to give than to receive.  (Acts 20:35). Grace and Peace to You! 

Saturday, August 10, 2019

Creative Church Crafting

There are many opportunities to be creative at church, especially since we were crafted by a creative God in his image! ☝👨👩 We sang a song at church last Sunday that mentions all the different colors of the world - 


"Jesus loves the little children, 
all the children of the world - 
red and yellow, black and white, 
they are precious in his sight,
 Jesus loves the little children of the world." 

I was delighted to see the children's faces - they were surprised that we of the mature set knew that song too! 👴👵

I wanted to compile a post like my best tips post and include an index to other longer church craft posts I've created in the past. Enjoy! 

* Advent Article & Crafts
~~ <> @ <> ~~
 
* Banks
~~ <> @ <> ~~
 
* Bargains Galore
~~ <> @ <> ~~ 

* Bulletin Boards
~~ <> @ <> ~~
 
* The Bethlehem Project
~~ <> @ <> ~~

Date: December 21, 2011-Christmas Stockings

I was rooting around in our church’s Sunday School teachers Resource Room and found two boxes stuffed full of pieces of old felt leftover from some other project, so I decided to make Christmas stockings for my Sunday School kids.

~~ <> @ <> ~~

* A Bookmark
~~ <> @ <> ~~

* Christian Acronym ATC's
~~ <> @ <> ~~

* Christmas Card Exchange
~~ <> @ <> ~~

Date: December 21, 2011- Church mouse Cookie

Making a list and checking it twice. Okay, I just finished sewing up the felt cookie with the bite out of it for our children’s church mice Christmas drama. It has white felt “icing” and bugle beads for sprinkles sewn on. The rather flat “pillow” is stuffed with plastic grocery bags. They mold a little flatter and stiffer than pillow stuffing will. Some of the children were to hold candy canes and they came from the dollar store. Now to find “nests” of blankets/towels for all the “mice” and wrap the HUGE “gift” with wrapping paper and a large bow (hot water tank box) for the stage. 

~~ <> @ <> ~~
Date: Jan to Dec 2020: Weekly Coloring Sheets I'm doodling weekly coloring sheets to share with my church family. There are adults as well as children who like to color! I like to use Twistable coloring pencils by Crayola to color with myself. For instance, our associate pastor takes a coloring book with him to medical appointments and colors in the waiting room. He said it is very relaxing and better to keep his hands and mind active while waiting to see the doctor than to watch a pot to boil, so to speak. 😇 The printable coloring sheets are FREE and available linked into our church website . The image is paired with scripture. IMHO, nothing is better to meditate on than God's word. 

'~~ <> @ <> ~~
Date: April 23, 2011- Easter Baskets
I made fifteen of these Easter baskets for the kids in my Sunday School class out of the small nut cans. They are like the banks I made earlier. The only thing I did differently was to add two punched holes on the sides of the can and thread in tinsel pipe-cleaners for the handles. I found tiny goodies to put inside. On most of the medallions, I hot-glued a stamped duck (Stampin' Up) to the front. The duck's bow was colored to match the scrapbook paper.


~~ <> @ <> ~~

* God Richly Provides!
~~ <> @ <> ~~
 
* Golden Rule ATC 
~~ <> @ <> ~~

* Hand-Crafted vs. Store-Bought Toys
~~ <> @ <> ~~
 
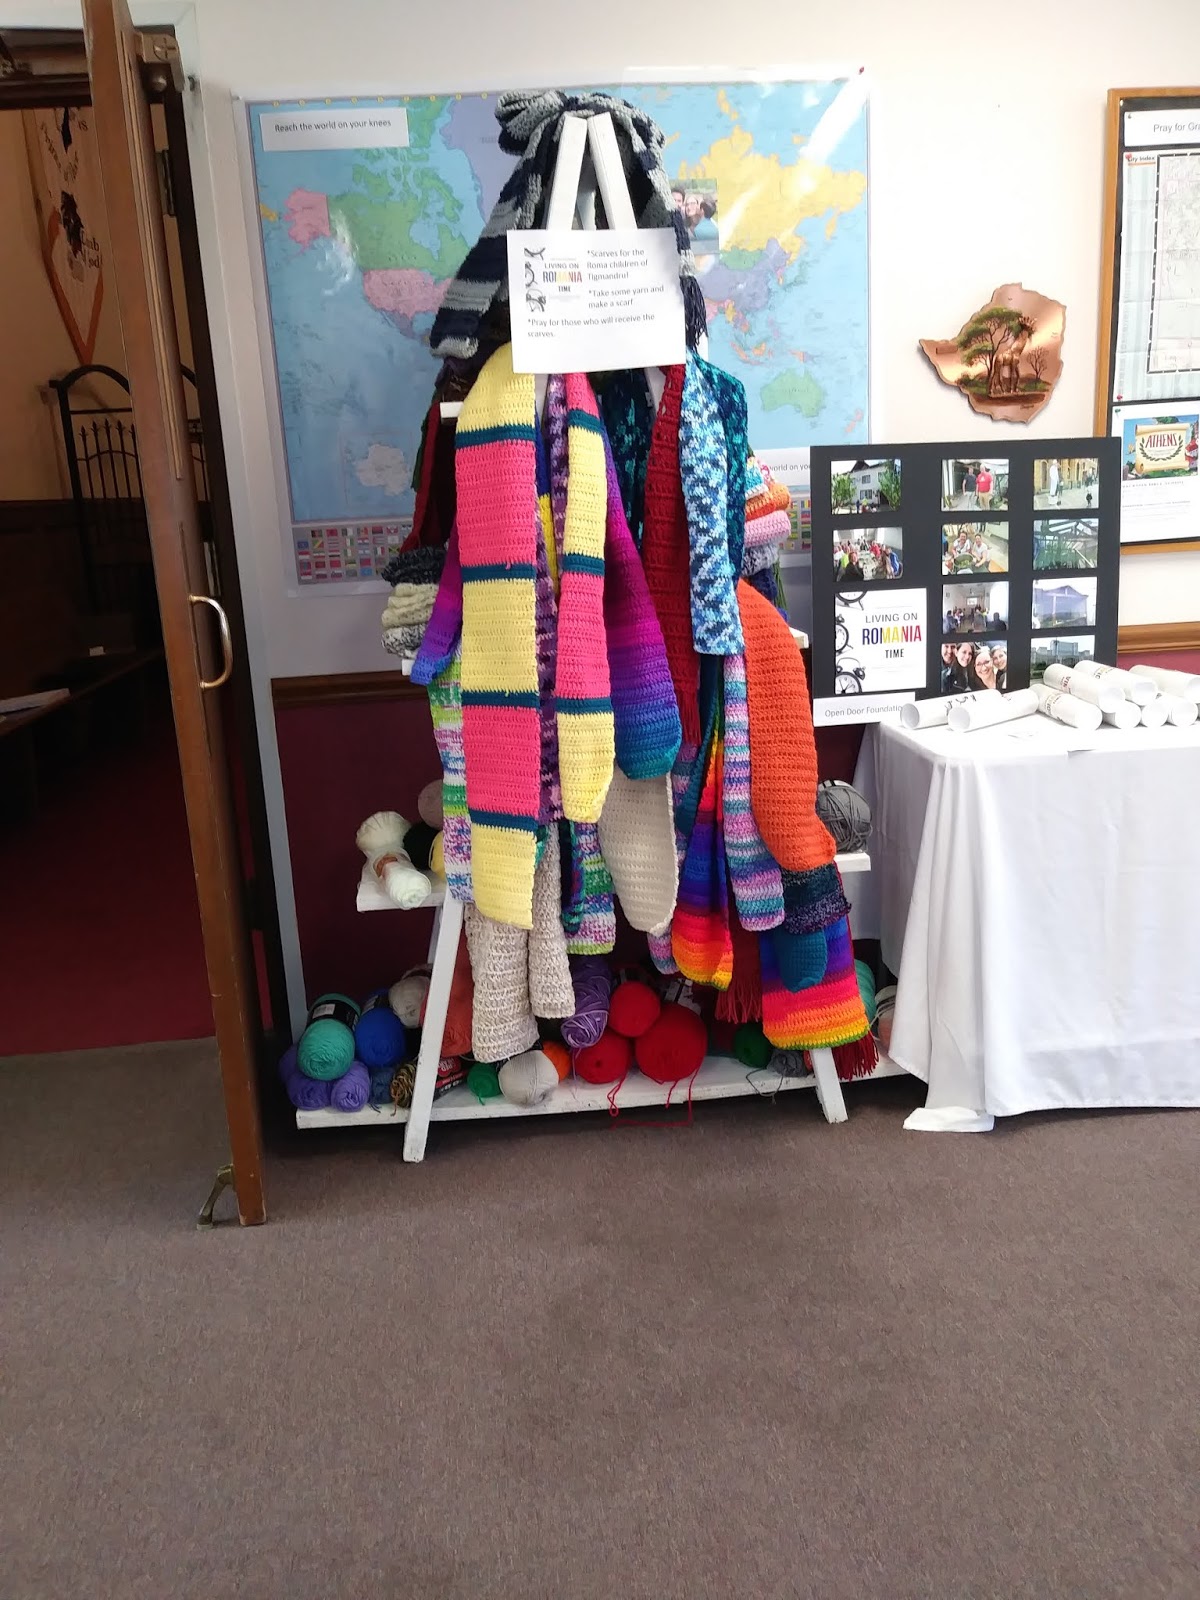
* Mission Project (July/Aug 2019) = this is our ladies current mission project - crocheting scarves for young people in another country. To date, we have 60 of the projected 80 scarves. My first scarf and hat (blue & gray) is at the very top of this mission scarf tree.


~~ <> @ <> ~~

* More ATC Ideas!
~~ <> @ <> ~~

Date: Tuesday, April 10, 2012 - Mr. Egghead

Here’s what I made for my Sunday School Kids this year. I made a template pattern of a large egg from heavy  white cardstock a printer gave me and cut it out with a handle so they could carry it easily. I kept it black & white so they could color it if they so desired. After watching Rack, Shack, & Benny (a Veggie-Tale movie) a few weeks ago, one little girl in my class said she wanted a chocolate bunny for Easter, so each egg had a chocolate bunny taped to the front. I also found a magnetic refrigerator Creation Bible story toy at a surplus store for 50 cents apiece which I taped to the back.
~~ <> @ <> ~~

* No Glue Playdough Slime Recipe  Note: This is NOT a gluten-free recipe. 
~~ <> @ <> ~~
 
* Pillowcase Aprons
~~ <> @ <> ~~
 
Date: March 28, 2012 - The Last Supper


I come from a long line of crafty women and one of the photos I found while digging in a box of photos is of my grandmother’s “Last Supper." She loved dolls and wanted to make a realistic representation of DaVinci’s painting.
To find enough male doll figures (I believe they were GI Joes) Grandma came to town for a visit with a shopping list in hand. She and mom went thrift shopping to purchase the figures,  to buy material for the Biblical costumes she sewed for them and the tablecloth for the table. Also, they purchased tiny dishes and clay for the miniature loaves of bread. Some even got wigs of hair glued on and tiny sandals. My Uncle made the long wooden table and benches for the “disciples” and “Jesus” to sit at. Grandma displayed her creation for many years on her sideboard at Easter and after she passed away, my mother displayed it on top of her restored upright piano. It might have graced the communion table a time or two at our home church during the holidays too. 

I bet my preschoolers in Sunday School would love this hands-on representation of the Last Supper. I just may have to do as Grandma did and make one too. 
~~ <> @ <> ~~

* Tissue Box Notebooks
~~ <> @ <> ~~

* Veggie Tale ATC's
~~ <> @ <> ~~ 

Tuesday, January 8, 2019

Crafty Christmas Gifts

2018 = This year's selection for a crafty Christmas gift for all the ladies in our family (his and her sides) was a pincushion and I found the idea at YouTube on a video titled "Easy Pincushions with Jenny, Misty, and Cindy" by Missouri Star Quilt Company. I really enjoyed shopping at thrift stores for the containers and bought the Lizard Litter and some pillow filler fluff. Just a warning - the smallest bag Petco carries of Lizard Litter is a ten-pound sack of crushed walnut shells! 😁

Many of the pots were still dirty from their last use, so almost as soon as I got home with them, they got scrubbed in a warm, sudsy bath. I looked them over carefully at the store for cracks and chips and a couple of them didn't transfer home so well, so I had to touch up a couple with matching paint. All in all though, they were so cute when I finished making them. 

If you decide you have to make some too, here's what I suggest: several of the containers were deep and I stuffed the bottoms of them with plastic grocery sacks and foam packing before adding the glue around the top edges and then stuffing the pincushion bubble in and adding more glue where needed. To make the pincushion bubble,  I put the center of the fabric upside down into the top of a little cardboard tea package lid that was about 1 1/2 inch deep (you could use a custard cup or other small container), spooned in about 3 scoops of lizard litter, then drew it up into a "bubble" and stuffed pillow fluff into the opening (which will be the bottom of the pincushion), while twisting some strong crochet thread around the "neck" to tie it closed (secret: tie a slip knot first with a 3 inch tail and pull tight, then wrap the thread around the neck two or three times and tie off) and cut off the excess fabric. I used a thumbnail and a Chinese bamboo chopstick to push the pincushion pillow into the opening of several of the containers and tried to smooth them out until tight. Then I stretched a couple of large rubber-bands around the top of pincushion and the bottom of the containers to hold the pincushions in until the glue dried and set overnight. Added a couple of straight pins and a safety pin on top to finish them off. Made 25 in all and the gals had fun picking out their favorite one to take home!

If you want to see details, click on the photo to enlarge! 


Thursday, February 23, 2017

Recipe: No-Glue Playdough "Slime"

Slime is popular again and I've watched several tutorial videos that use ingredients that aren't safe for toddlers. Tiny ones often experiment with taste and textures of objects they are playing with by putting it into their mouths.  I'm resurrecting a old play-dough recipe I used to make for my kids in Sunday School that looks very similar to the opaque slime, but won't hurt your child should they try to eat it, unless they have been diagnosed with celiac disease or gluten intolerance, then they should NOT play with this "slime" playdough. 

Warning: This is NOT a gluten-free recipe, so be mindful of the children you make this for. 

~~ <> @ <> ~~

You will need:

1 cup white flour
¼ cup salt
2 tablespoon cream of tartar
Mix these ingredients in a medium saucepan on the stove.


Then add the following items:
1 cup water
1 tablespoon oil
2 teaspoon food coloring.


Directions:

(Note: Children older than ten years of age can cook this recipe for their younger siblings with adult supervision.)

Stir while cooking over medium heat (three to five minutes). When it forms a ball in the center, turn out, it will look like a terrible mess and you'll think it isn't cooking right, but just keep stirring. Knead on a lightly floured surface for a few minutes Add 1 to 2 drops of wintergreen extract and a tiny amount of paste food coloring at this time, if you want a good smelling colored playdough. Knead until well mixed. This playdough will keep for quite a while if stored in an airtight container. When it begins to dry out, add a few drops of water in container before storing to regain softness.

(Note: I have used an empty and washed plastic margarine tub with a  lid to store playdough in. It remains good for about 6 months.)

Sunday, November 8, 2015

Sharing Handmade Kindness Challenge

-- Week One --
Sharing Handmade Kindness: Family and Friends

I have joined Jennifer McGuire's "Sharing Handmade Kindness" Challenge
for the month of November. 


I watched a video by Shannon Green called Journaling by 5's that I used to make this ATC and Roladex card, which was made for all my ATC club friends.
 
 
I did not necessarily follow Shannon Green's timeline, however, these came together quick as I applied her formula to make the atc (November ATC club theme: Architecture).
 
a. Color background = I used watercolor paint by Art Quest and a wide water brush.
b. Collaged recycled bits of paper = I tore up bits of security paper envelopes. I love the patterns and added them to the dried rolodex cards with gel medium. After it was dry I sanded the rough texture of the gel medium to make it smooth.
c. Use stamps or stencils = actually  I sponged through a plastic number mask and stamped the flowers and leaves in red and black stazon inks.
d. Then add images and/or words = I stamped the cottage, the extra flower and the sentiment, colored them, cut them out, and glued them down to the cards. I added the address label to the rolodex card and the sentiment strip to the atc.
e. Then use  a pen/pencil and other things to enhance the card. In this case, I used a black colored pencil to trace around the address label and sentiment, added the tabs, washi tape, and the gem.
~~~~~
-- Week Two --
Sharing Handmade Kindness Theme: Community
 
I broke out the small gelli plate for the very first time
and made a pocket letter for an exchange.
Here's one of the cards =
 
I also made two thank you cards, one for my pastor and one for a friend who has donated a copy of his published cemetery book to our local genealogical library center.
I made it based on this design, click here.
 
 
I did not have the kit mentioned in the video, however, I cased a similar copy with eight accordion folded panels by cutting down 2 sheets of 8.5" x 11" pieces
of cardstock in half lengthwise
and taping three of the halves together to make one long strip of paper.
Next, I scored it about every 2.5" to 3" for every panel until I had 8 panels.
Whatever was left over was cut off.
I then stamped four different background stamps on 2 panels each and glued foam letters
to the center of each design until I spelled out the word T-H-A-N-K-S.
On the back of the end panel, I stamped a "thank you" in the center back
and signed it.
It looks nice standing up!
~~~~~
LOVE IT!
 I have to tell about our Pastor's elementary children. They made something handmade with their mother and handed small plates of it out this morning to people as they left church.
They were the yummiest chocolate chip cookies!
They were sharing handmade kindness today too with their community!
~~~~~
-- Week Three --
Sharing Handmade Kindness: Kids
 
This is what I made!
 
A pocket letter (I have one more to make) and several small hand games for the kids in my church. I gave the small tic-tac-toe games (found the game pieces at our local odd-ball salvage store called Bargain Factory. I think there is a link to it over on the side menu)
 to our church's candy lady for her yummy bag
 and the pocket letters will go as a card shower to two kids who are battling cancer.
I made the pocket letters like my rainy day puzzle,
except I left it in black and white so that the children
will have something to color if they feel up to it.
Having spent two weeks in the hospital myself a couple of summers ago,
even with TV, it's just plain boring, so
I can't even imagine spending a large part of my life there.
And just like an adult pocket letter, I have small things
appropriate for their age group inside each pocket.
If you are a crafter, consider joining us in making a card for the children
and/or their siblings and their parents. Jennifer McGuire has
posted the due date and rules on her blog post here.


And by the way, a niece shared this video with me today.
She's taking college classes and this is what she learned in her psychology class about 
the social pain of rejection from bullies.
It seemed appropriate to share it here.
She said she learned that the children's little saying
"Sticks and stones will break my bones, but names will never hurt me"
was false statement, because they both register in the same region of the
brain as pain
which is the body's way of saying that something is wrong and needs repair.
 
It reminded me of several Bible verses such these:
"Pleasant words are a honeycomb, sweet to the soul and healing to the bones."
~ Proverbs 16:24
"A cheerful heart is good medicine, but a crushed spirit dries up the bones."
~ Proverbs 17:22
" Therefore, as God's chosen people, holy and dearly loved, clothe yourselves with compassion, kindness. . ." ~ Colossians 3:12
~~~~~

-- Week Four --

Sharing Handmade Kindness: With Strangers
~~~~~
I didn't get to complete the Sharing Handmade Kindness Challenge
because the son shared his virus with his ole mom and dad,
so we were sick all through Thanksgiving weekend and I still can't seem the shake it,
however, just as I was getting ready to get off the internet a few minutes ago,
I saw that Katie Couric has written a news story on the Kind Campaign.
That's kinda exciting! Click here to see the video and her news article!
I have a craft that I made for my Sunday School kids several years ago,
that as soon as I can retrieve it from the craft barn and get it scanned,
I will upload it here. It goes very well with the theme!


Remember the wooden carpenters extension rulers that folded up?
Well this is based on that design.
You will need eight (8) bright yellow atc-sized cardstock cards (2.5" x 3.5"),
a hole punch, seven (7) large brads, a black marker and a yard-stick.
In the two end pieces, on the short sides, punch one hole. In the rest of the pieces, punch a hole  on each short side. With the marker and straight-edge, mark a line on on long edge, making sure each card cooresponds with the other.
Starting at one end, place each piece over the top of each other, like fallen dominoes. Line up holes & place brads. Remember, you will want slide atc's together like the wooden ruler.
Then using the yardstick, make lines on this golden ruler to correspond
with the inches on the yardstick.
Below that, add the words, evenly spacing the words across the "ruler:"
 
"Do to others as you would have them do to you." Luke 6:31.