Showing posts with label Storage. Show all posts

Wednesday, May 26, 2021

Craft Room Storage Tips


Have you ever experienced your own form of a Craft Room Obstacle course? 😉 I have and when you buy crafting supplies, you need to figure out where you are gonna store them when you get home. In my case, I live in a tiny home -- basically it is a two bedroom cottage. I LOVE looking for storage ideas and gadgets.  So I thought I might share some of my favorite ideas with you.  Some have been gleaned from another post called "My Best Tips." I decided to put the storage ideas in a separate post as I will be sharing them with a new crafty friend. 

DATE: June 29, 2010

I love all the newest gadgets, but can't always afford them. So the next best thing is to crank up the ole creativity and repurpose an old gadget into a new one. I found this stainless steel holder thingy at a thrift store for about 50 cents (I had no idea what it was in its old life at the time, but later my husband told me he thought it might have held pipes, you know the smoking kind). Anyway, I brought the new-to-me gadget home, cleaned the dust off of it, looked it over (it revolves!) and added a few things to it and wha-la – on the top shelf, it holds all kinds of scissors, hole punches, pliers, a hammer in the center, and in the bottom spaces where I guess the bowls of the pipes went, is just the perfect size for embossing powder jars. And it has a handle in the center, so if I need to move it to clean off my table (yeah, right, in the next century), I can!

P.S. The above might also be a revolving spice rack. Looks very similar to something I saw at a thrift store this last weekend with all the jars in it. This is the mark on the bottom -- MADE IN CHINA. ALL RIGHTS RESERVED. MMII M, KAMANSTEIN, INC., ELMSFORD, NY 10523

-------------------------

DATE: 17 Feb 2011

Post - God Richly Provides!

-------------------------

DATE: 25 June 2011
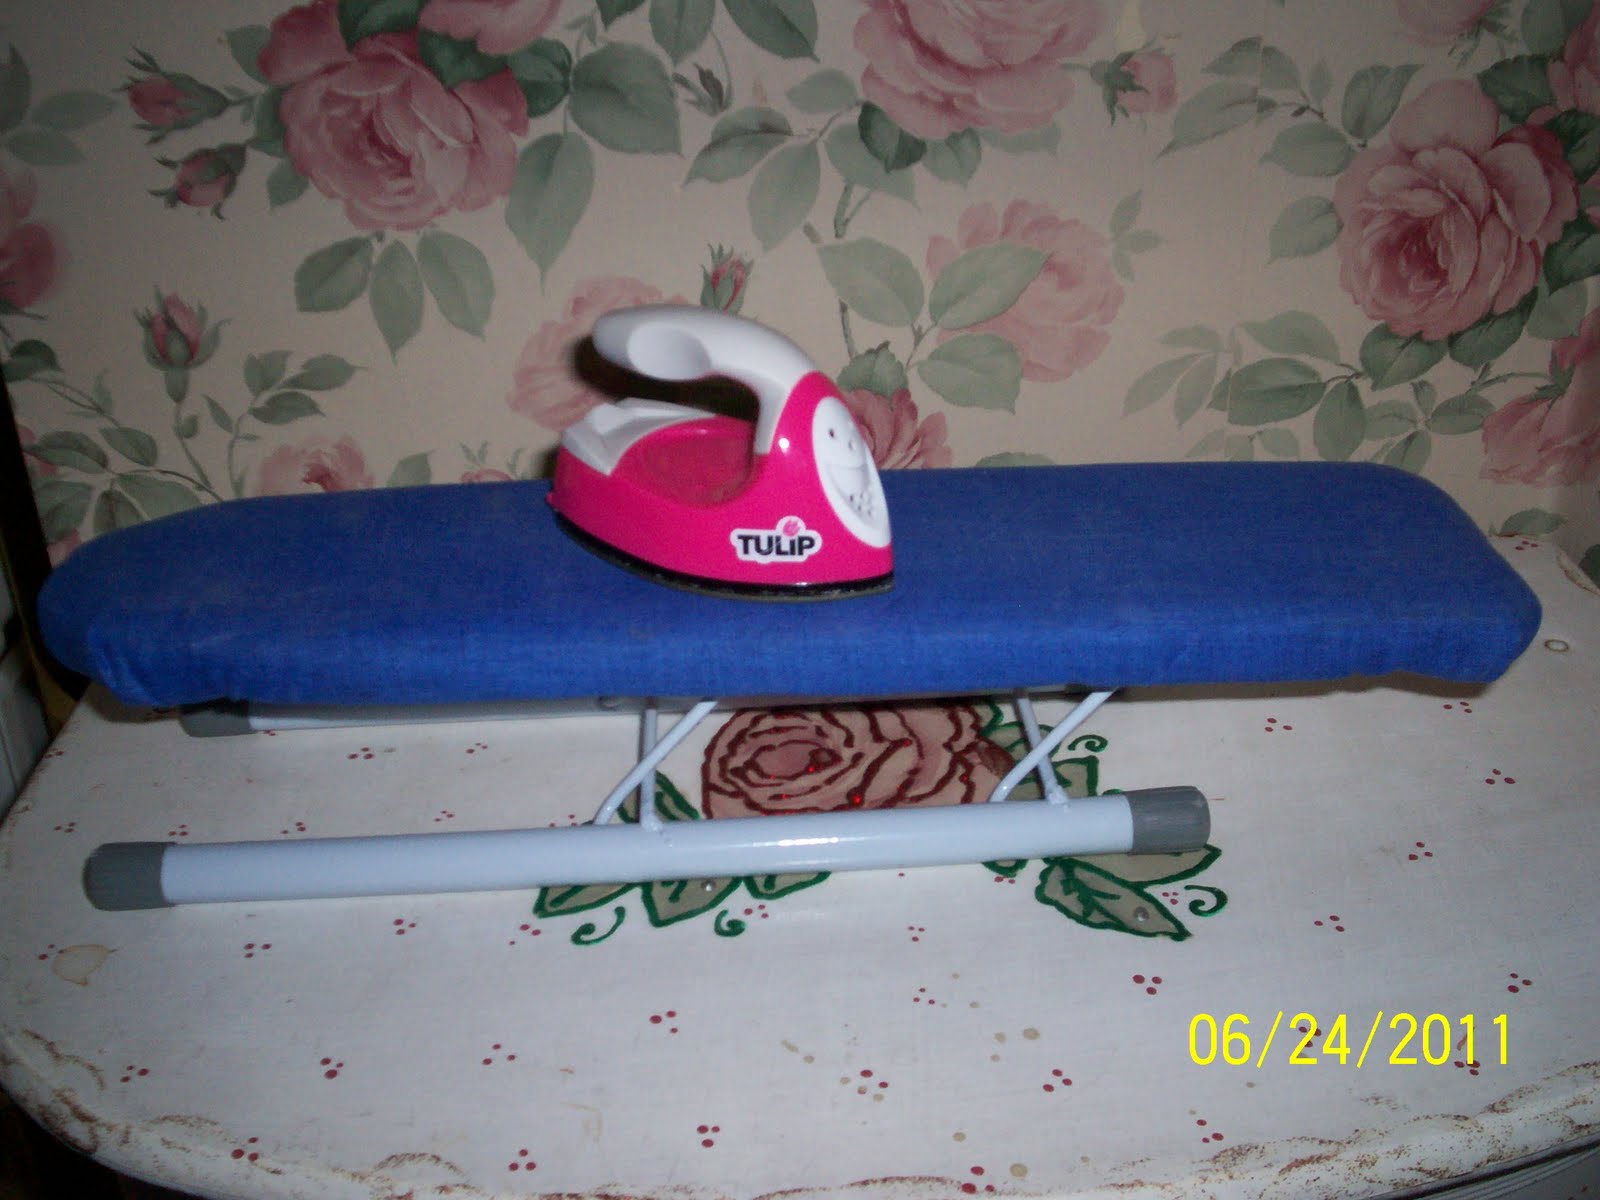


Since I save all the used ribbons that come my way and have purchased bundled, spool-less odd lots at a local children’s museum teacher’s resource room, one year I asked Santa for a ribbon iron and my son purchased this Tulip Mini Fashion Iron for me. It’s so light and easy to whip out from the little zippered pink makeup bag (also purchased from thrift store) to iron those ribbons flat. I found the cute little ironing board for $2.50 at a our local salvage store. It’s for ironing collar and cuff seams when sewing clothing, but it makes a dandy counter ironing surface instead of having to drag out my big ironing board to set up. If your husband is handy in the workshop, he might be able to saw you a little ironing board from a picket fence board (16” long) which you could cover the top with old cut up potholders to give it a little padding, topping with fabric and stapling it on. The legs on mine are like the big ironing board legs that let it fold up flat, but your hubbin could attach dowel rod legs that screw on to the bottom. I would also slip on rubber chair tips on the ends of the legs so they don’t mar your counter surface & would give it a little gripping power as well.

-------------------------

DATE: 12 Jun 2012


I found this cartoon in my news feed on Facebook and thought how appropriate it was when applied to my “craft room” which is actually a corner of my kitchen. I’m not going to enlighten you with a photo of the mess in one-half of my kitchen, but there are some of my crafty friends and I’m not naming names, like you Amy, who are in the organization mode. You can celebrate Christmas (or Hanukah) more than once a year when you decide to clean out, that is, finding goodies you “forgot” you bought! *smile*😁
----------------------------
DATE: 1 Jul 2010
I was looking for an easy way to store my extra die-cuts, stickers, and assorted stamped images in one place. My husband worked in a computer warehouse and at that time brought me a bunch of extra CD envies home that they were going to throw out. I repurposed them to hold my extra bits and pieces in this shoebox. As I've been digging through some of my drawers in my craft corner for the extras that I've squirreled away, this box has gotten fatter and fatter, so much so that I think I'm gonna have to divide it into two – one for card bits and another for scrapbook ephemera.

Update: Since my husband no longer works for that particular company, I use zip-loc baggies to store my images in. I still slide them upright into plastic baskets/shoeboxes though. I like the baggies because they are clear and I can see what I'm selecting from the basket. The best baggies are the kind that have a space for writing on the front and a permanent sharpie marker is perfect for writing on it! 
-------------------------
Date: July 19, 2010

I found a plastic three drawer shoe keeper at Walmart and started keeping my cards in it. The top drawer holds all-occasion cards (mostly blank inside), the middle drawer – birthday, and holiday cards. The box on top holds the envelopes. If you slip the invitation sized (A2) cards inside the drawer with the fold towards the top, you can keep approximately 150 cards in each of these drawers.


-------------------------
DATE: 12 Sep 2012
-------------------------
DATE: 25 Dec 2013
-------------------------
DATE: 3 Jan 2015
TUFF SHED UPDATE (2022) = While we still have this building, I will give you some things to think about when considering whether or not you should move out to your backyard to an arts and crafts studio she-shed -- 

1. How many out-buildings does your city/county allow in your yard? (Our city allows for 2 and we have that many, this craft barn and another smaller shed for gardening tools, camping equipment, etc.)

2. How big of a building can you afford? (This one cost about $6,000 bare bones. It was built for us on Valentine's Day).

3. How many people are you willing to share the building with? And will they respect your space? (My dream was to have an arts and crafts studio with room for a few friends to come craft with me, but since my husband decided he wanted to realize his dream too, for a library/office -- think Rex Harrison's library in "My Fair Lady" movie, that has never happened.)

4. Is it going to have running water for washing up and perhaps a toilet (We don't have running water in the barn. What I did have was a large drink dispenser with a spout on a small table and our house has a back door for access to the restroom in the house.)

5. Are you going to have electricity for lights and electric crafting tools? (I do have electricity for lights, electric tools and a small heater and/or fan via the seasons. It took a while for me to get a large heater for the space. The building was insulated on the walls and ceiling when it was built and carpet was placed on the floor, but we forgot to add insulation under the building, so the floors get cold. We were trying to build it on a shoestring.)

6. How are you going to heat or cool it? (Tiny homes have the same issue. Many of them are going to a wall mounted heater plus air-conditioner similar to a built-in that hotel and hospital rooms have.)

7. Are you going to have built-in cabinetry or free-standing shelving? (We didn't have a Restore store back then, so we went shopping at thrift stores for bookshelves.)

8. Are you going to have enough space to invite a few friends over for a crafting party?

I don't get as much use out of it as I thought I would. It's basically a storage shed and I have my YouTube table set up in the corner of my living room and a few supplies in two 3 tier, rolling carts. I'm very protective of my corner and hubby gets to run out to the shed for me when I need something. 😁
-------------------------
DATE: 22 Jan 2015

 I had been using transparent plastic shoeboxes (see above) . Right now all my spool ribbon are stored in cardboard shoe boxes. With two guys in the family who are hard on shoes, I have a steady supply of them. I was given a big sack of sewing trims and bias tape and I found they fit perfectly in these three metal index card catalog boxes. I really like the sliders in the bottom to keep the trim cards standing upright.


-------------------------
DATE: 22 Jan 2015
-------------------------
DATE: 8 Mar 2015
Post - Shed-Oh! 
-------------------------
Date: 26 Nov 2018
-------------------------
DATE: 3 May 2019


Yes, my husband is up to collecting stuff from the trash bin again. He brought home a bunch of heavy duty cardboard tubes that were at the end of the roll of label stickers that they use in the warehouse where he works and asked me what I could do with them, so here's one of my ideas. I also had squirrelled away a couple of wider tubes from crochet thread, so those got glued down in the center of the ramen noodle cardboard soup box and then I inserted the smaller tubes around them until I couldn't fit in anymore. I like the color of the cardboard so left them au natural, but they could be painted before gluing. I tied a strip of denim cut from an old pair of jeans that my husband or son gave me into a bow around the box, inserted my crafting tools into it and wha-la - a tool-box!

Later, I found a basket at a thrift store with two large dowel handles on the sides that the box fit down into perfectly. Easy to carry from place to place now! 
-------------------------
DATE: 3 Dec 2019
-------------------------
DATE: 15 May 2021
Video - More Happy Mail!  (my video shows an ATC storage idea)
-------------------------
DATE: 15 July 2021
In my Best Tips post, I mentioned these "sponge applicator tools." Around our house, we have a never ending supply of these little bottles, so we use them as storage containers for tiny beads, nails, and tacks, etc., after all the pills are gone. This is my newest idea -- a two-in-one storage/tool handle for Tim Holtz's replacement sponge applicators. I use a long forceps/tweezer tool that I picked up at Harbor Freight to grab and pull a sponge out of the bottle to add to the lid (click on photo to enlarge and see the Velcro hook tape circle I glued to the top with E-6000 to hold the sponge applicator.) Then I use the "handle" of the upside down bottle to pounce ink from the moist sponge onto a piece of paper.  Handy-Dandy!

-------------------------
DATE: 17 Dec 2021

When I homeschooled our son, I was a unit study gal. I loved pulling everything together that we needed to study one thematic lesson with. Well, that seems to be my thing and I found the perfect solution to do just that with my craft supplies. I was watching Possum Patty on YouTube and she was organizing her craft room. I asked her what those large sacks she was using to slip her 12 x 12-inch scrapbook paper tablets into, and she said Hefty's 2.5-gallon slider bags. The 12" x 12" paper pads fit into them just perfect, and I was on a roll after my husband picked up two boxes for me at Walmart. This is my largest sack of farmhouse goodies to date. 

My main themes so far are
Black and White (stamped & patterned paper)
Boy (could be titled Male, too)
Celebrations (Birthday, Holiday & Seasons)
Colored paper
Cute! (Knockoffs, Mary Engelbreit, MacKenzie Childs) 
Dolly (my Teesha Moore inspired, art journaled zetti-doll stuff -- her faces, clothing,
     background, printable body parts, hair, accessories, quote sheet, etc.)
Girl (could be titled Female also)
Farmhouse (includes Western)
Heritage (vintage like Graphics 45, Tim Holtz, etc.)
Kitchen (housewife, farmhouse, & retro)
White CS (plain white cardstock)

I might add more categories after I see what I have out in my craft barn. 
In addition to the large Hefty Sack, I added a basic three smaller plastic zipper bags in a quart size for those things that could get lost in the bottom of the larger sack. So those sub-sacks are labeled: Images, Scraps, and Words (alphas & tags), however, I added an extra sub-sack to both the colored paper and white cardstock called Die-cuts. These are the items that you can sometimes cut down from the 12 x 12 paper packs to use as images, tags, and alphabets that coordinate with the paper pads. 
I also went through my stash of stickers that I picked up at Scraps KC awhile back and added those to the category sacks. Tonight, we went out and bought a large plastic tub at Walmart that was wide enough at the end (about 14" wide) and about 12" deep to use as a filing cabinet of sorts to store the ephemera in, in all their sacks and it didn't break the bank! 🏦$😊
-------------------------


Friday, April 3, 2020

My Positivity Journal 2020


Note: Playlist is set up like a series of chapters. Each month of my journal is a chapter. Click on the link and go to the chapter you haven't seen before to watch and click on it to begin the viewing. 

My therapist asked me to continue with the positivity journal. Since the last one became huge and deformed at the spine, I've decided to make a topsy-turvy journal in the bullet journal format. (Anybody remember the topsy-turvy dolls? I had one as a child very similar to this one.) Crafty Hodges on YouTube created her journals with one half of the year right side up and the second half of the year upside down and both halves met in the middle of the book. She said it prevented the journal from getting deformed like mine did. So I'm going to try it in a second composition notebook. 

Essentially a bullet journal is a homemade planner and a collection book of lists. The only planner part of mine is going to have a teeny tiny calendar and a list of gratitude's at the beginning of the "chapter" for each day of the month. I'm going to have similar things to what I collected in my positivity book last year - favorite things, good memories, quotes, and scriptures, but in addition to that, I'm adding 1 1/2" x 1 1/2" blocks of doodles (my requirement, not hers, as I only have so much space for images) as I will be following Marsha Baker's 365 Day Doodle Challenge all year long at the edges of the pages. 

I wanted to learn sketch-note doodling because I thought it would help organize the sermon notes I've been taking for the last couple of years, however, most of the sketch-note examples I've seen on Pinterest are what I call "messy." They are all over the page in a random fashion. Not exactly what I had in mind. As a person with ADD, I get anxious when I get lost in "messy," so I guess I need to find some layouts that I can compile in a hurry when writing down my Pastor's sermons. 

Also, since my journal will be flipped upside down, the envelope pockets in the last journal won't do, so I took some large mailers and cut them in half to make new pockets with flaps and then glued on solid cardstock and washi tape to pretty them up before gluing them to the inside back covers of the composition notebook.  The major theme of my whole book will be based on Mary Engelbreit, which as most of you know, is my favorite illustrator, so I will be using from my collection of ME paper items to decorate it, however, just so you know, I AM NOT cutting up any of my precious books (65 in my collection so far) to decorate the journal with. I'm using cards for the divider pages over scrapbook or gift wrapping paper and bits and bobs cut from packaging and other papers. 


Also, I wanted a bead charm to hang off the side, but if I hung it at the top, then when I flipped the book, it would be at the bottom of the book, but then I decided I didn't care until... the elastic string began to cut into the paper at the bottom of the notebook. My friend, Julie, who loves making books came to the rescue and suggested that I add the string at the middle of the spine, so I used my We R Memories Keeper Big Bite long arm punch to punch a hole and attach a flower eyelet to either side of the spine and then at the center of the signature, I used a pokey tool to punch holes through the paper to line up with the eyelets. I had to use a large eyed needle to thread the elastic through the holes to the center of the signature and tie that off. I cut the ends off about 2 inches or so and glued tiny punched hearts to the ends and added glue to the knot to strengthen it. It's down right cute now. 


JANUARY'S page themes are (an index is located on both halves at beginning of each section along with the color of the month - pink). Each circle tab will coordinate with the paper and I'm using a paper clip bookmark to indicate which month I'm currently on. 


JANUARY'S TITLE PAGE: is a Mary Engelbreit card front with quote glued to a piece of cherry scrapbook paper: "The most wasted day of all is that on which we have not Laughed." (Chamfort). At the end of each video, I will be showing you a card I made with my collection of Mary Engelbreit stamps. It's about time to put them to good use. smile! 


I'm going to continue adding the words from the journal that I'm willing to share to my gratitude blog here.


Click on the video tab at the top of this blog. It's a direct link to my YouTube channel so you can view the latest one. 

until next month, adios! 

P.S. When I uploaded my video to YouTube tonight, it was crisp and clear because I made the video at the recommended high definition. But I had difficulty with it after it was uploaded - sometimes the screen goes blurry. If you notice that, please contact YouTube about it. They may be working on bugs that I just haven't heard about yet. Another channel made a comment about that very thing on a video I watched recently, so I know it hasn't happened to only me. Thank you for watching my videos, reading this blog post, and going the extra mile by commenting! Blessings!

Update: Still don't know why the video blurs, but refreshing the video page helps to clear things up if you are determined to watch it! 
~~ <> @ <> ~~

I'm sharing a bit of myself with my church family by doodling coloring sheets with scripture on them every week. Here is how I display mine in my kitchen, in a document sleeve to keep it splash and jelly-proof, so that I can meditate on it while doing kitchen chores:
My therapist wanted me to share with somebody something I liked doing plus I was getting the same nudges from God to share too. I've learned a long time ago you can't win when arguing with God. smile! I didn't want to, cause this was something for me and it would be a lot of work. . . I thought of all these excuses why I didn't want to do it. But I gave up when I got the homework assignment from my doctor, so. . . I explained why I was doing this to my spiritual family, gave them permission to print off more if they needed to, and then I gave them some ideas of what to do with the coloring sheets. Here's some of the ideas I came up with. If you have another idea, please share down in the comments at the bottom of this post. 

  • One of my homeschool friends is printing off a coloring sheet for every child in her family to color while she has family devotions.
  • I take a clipboard, paper, a pencil box and crayons with me in a Mary Engelbreit tote-bag that another friend found for me at a thrift store when I go to the doctor or anyplace I have to wait. I either doodle or color. Come to find out, our associate pastor likes to color too and takes a coloring book and crayons with him when he has to wait somewhere. It makes the time go faster. Better than waiting for a pot to boil, so to speak. smile! 
  • Give a coloring sheet to a neighbor. Many adults as well as children like coloring therapy. One of the ladies in our church came to me last week, wanting a new copy of a previous week's sheet as she "messed one up" while watching a recent sports game on television. I've made extra copies in case that happened or if someone missed out on a previous week's copy because they were out of town or ill.  
  • Write a letter on the back and send it colored or uncolored to a pen-pal or a grandchild, etc. 
  • Collect them and make coloring books for someone as a Christmas gift. Since I gave them permission to make copies, they can make more than one. 
  • I also took extra copies with me to a monthly coloring club hosted by a local paper crafting store. One person took one sample sheet of all I had with me, but the other two ladies politely declined them, however, since they asked me how I have been (it's been a year since the last time I attended) I shared the good news about how God healed me from all the physical pain I experienced last year.  

See my FABULOUS FREEBIE tab above for printable sample coloring sheets. 
~~ <> @ <> ~~

FEBRUARY's video has been uploaded without a hitch on YouTube and the words are up over at my gratitude blog. Did you know that YouTube has free music you can download from their website for use with your videos? I didn't until another YouTube friend told me about it.  So this month I chose "Grace Behind the Curtain" by Silent Partner to create my video with. Did learn that Microsoft's Video Editor App doesn't have any way to edit the background music length, so had to get creative and get some up-close shots to pad and fill in the video so that the music would end at the right place. Creating and editing a video is as much a creative process as doing the actual project like my positivity journal.  Thank you for watching. Be sure to subscribe so that you'll know when my next video has been uploaded and click on the like button. 
~~ <> @ <> ~~

Everything has turned upside down in my world. We're in coronavirus lockdown. However, I know whatever happens, God is in control, working behind the scenes and I'm still alive! Thank you, Jesus!

One of March's highlights is that Mary Engelbreit is offering a FREE coloring sheet for us to color while we are at home. I have a smart printer which can resize the image from a letter size image to small enough for a card, so I printed two sizes. One is a coloring sheet for my positivity journal and the other is a "digital stamp" sized image for a card.

Since we are socially distancing ourselves, but still meeting together via technology, my pastor has agreed to link my coloring sheet offering each week on our church's website. Please feel free to join us in worship and prayer via our corporate worship page. 

  • A great new coloring sheet idea! A girlfriend suggest that anyone could put two coloring sheets back to back with a piece of same size thin shirt board between them, laminate everything together and then give them as a gift to a child with a set of colored dry erase markers and a felt eraser or washcloth. 
~~ <> @ <> ~~

UPDATE (4/20/2020): I learned to do something new on my YouTube channel today! I added two playlists on the front page of my channel so that you can directly access my positivity journal and my doodle playlists without having to scroll through a bunch of other playlists under the playlist tab on the front page of my YouTube channel!  Hope it is helpful to you! 
~~ <> @ <> ~~

UPDATE (4/24/2020): Learned how to make linkie card devices for videos, so spent a few moments adding them to all my journal and doodle videos, however, if you don't see a link that you want, check the description box below the video. I still have some there as well. 

Also wanted to show you what coloring pencils I use. Since I'm frugal, I go for cheap, but not so cheap that you color with a canning wax stick  with barely any pigment in the pencil -- I've purchased some like that at dollar stores and had to throw them away. Buy a reliable brand. Prismacolor pencils are artist grade and expensive, I received some Fiber-castell for Christmas; heard Derwent is a good brand, but my everyday coloring is Crayola brand Twistable. The other set is from South Korea and they are like the Twistable's. Our homeschooling missionary friend sent the set to our son for Christmas one year. Her son and our son were pals here at home in the US. 


And I uploaded a video for Part Three of my Doodle Series this week. Please subscribe to get an email in your in-box to know when I upload a video. Be sure to click on "all". I found a book at Half-Price Bookstore that will be my next exercise in doodling scripture verses for Part Four called "Drawing in Black and White" by Deborah Velasquez. Never heard of her before, so this book should be interesting. I linked in her website up on the side menu. 
~~ <> @ <> ~~

April's Journal Video is done and uploaded to YouTube. Ran into a planning snafu - not all the stuff I wanted for a particular page came in through the mail, so I added a FUN substitute instead. One of the pages has tidbits of about half my washi tape collection!  Amazing how rolls of pretty tissue tape give such pleasure to paper crafters! And I couldn't find my ATC's that I was going feature in this month's video either, so I substituted again with some Mary Engelbreit coloring sheets I had colored in for 3-ring-binder's monthly dividers. Mine came from a coloring book that I received for Christmas, but Mary is offering some coloring sheets for FREE here
~~ <> @ <> ~

May's Journal video is up and rolling finally. Sometimes this is what happens in blog & YouTube land. You are working on something and you have it almost done and you are working on getting the voice over and music in and SOMEBODY bumps the desk and POOF! off into cyberspace everything goes! I was so NOT HAPPY! 

But then, I started over, even though I was NOT feeling it and I pushed through it, so it is DONE and uploaded to YouTube. I even have toe-tapping music from YouTube's free music library that accompanies the video. The music is what made it for me this time. I was telling a girlfriend that I try to learn something new each time about how to create a show and tell video, but I still have to work with the technology I can afford and stretch it to the max. 

When you log into YouTube, check your HOME feed or notification bell for new videos from your subscribed channels. I also sometimes find teeny tiny blue dots next to the channels I subscribe to on the drop down menu on the left side of my computer screen that indicates new videos. 

Also the Dylusions mushroom rubber stamp and Mary Engelbreit stamps I ordered from Rubber Moon finally came in and I created a similar Tunnel card design like Jennifer McGuire. And I also showcased some artist trading cards. 
~~ <> @ <> ~

JUNE's video is up on YouTube now! I have lots of project pictures in this month's section -- discovered I like Farmhouse Décor, so I began to mend, paint, repaint, stitch, declutter, sort through and I hauled 3 trash bags of stuff to the thrift store so far that doesn't fit in with the farmhouse look. My hubbin even began to help me with the projects. Be still my heart! 💓

I also have a list of FREE Printable Coloring Sheets for you over in the side menu that I doodled. I also created some more Mary Engelbreit rubber stamped crafts - a card, a candy jar, and an upcycled peanut cannister that I converted into Mom's Mad Money bank. It's going into the laundry room and it's for those coins and cash I find at the bottom of the washing machine. Not my problem if you don't clean out your pockets. It's MINE NOW! 😁

And I also discovered, while watching YouTube videos on farmhouse décor, that the blurriness of the videos may be caused by the pixel setting of the video. I always save my videos in the highest dpi that I can, but there is an individual setting on the video toolbar that can be changed by you, the viewer, so check the little wheel when you watch the current video and see what the pixel level is. Click on it to adjust it to the highest setting for the best clear viewing. 
~~ <> @ <> ~

My "Christmas in JULY" video has finally been uploaded! My gratitude blog post has been published! And I'm updating this blog post! YAY! June, July, and August here are usually hot and humid, but we've had a lot of rain, which tied up some of my crafting that needed spray-paint. Now the next project is getting out and taming the green, overgrown jungle in the backyard and dumping the pools of water that are harboring our pesky state "bird" (MO. Mosquito). 🦟🦟🦟

Pastor handed me two sheets of paper last Sunday that a member of our church colored and sent to him like a card. Remember I said that the members of our church could color them in and use them for stationary? Well, she followed directions! Thought I would share them with you. smile!


~~ <> @ <> ~ ~

AUGUST - Still working on my journal, but I finished one project - the first in a series of YouTube Creator Academy tutorials and graduated from the first one. Woo Hoo! And got my diploma! 

My poor left foot. I didn't see the heavy flashlight until it landed on my toes, nor did I see the desk leg reach out to grab my pinkie toe the other day and try to rip it off. One of my girlfriends told me that feet were made to move furniture. Neither the flashlight or the desk moved, but I sure did and I'm sure everyone passing by heard me yell. I thought house-slippers were supposed to protect my feet as well as keep them warm. So anyway, haven't felt much like getting up on them, so the August video is really, really late getting done. But done at last it is! Yay! 
~~ <> @ <> ~ ~

And then I jump right into SEPTEMBER. Well, maybe not jump. smile! Still protecting that left foot as much as possible, cause it's still kind of tender. I completed my 2nd Creator Academy tutorial tonight (9/17/2020) and obtained another "Letter of Completion." And watched a YouTube playlist from a teacher named Eddie Woo trying to Teach the Teacher about technology and YouTube. 😆
Saw some handy gadgets that I might have to invest in someday, if I can find them at the right price. Meanwhile, I did learn about lighting and some transitional effects that have been driving me nuts trying to figure out cause if my video editor has any, I haven't found them yet. And having to put on my thinking cap and taking notes -- what do I have already here at home that can give me what I need to add to my videos that can make them the best that they can be? One thing I learned is that videos should be at least three (3) minutes long. So what can I use to fill or pad my videos with -- maybe some up close shots? Far away shots? How can I add moving bits to my videos? Craft tutorials? I love the FREE music I've been obtaining from YouTube's Music Library. The creative wheels are beginning to churn! 💡
~~ <> @ <> ~ ~

OCTOBER is finally uploaded! Sometimes things don't go as planned, but you have to try, try and try again! Words from my positivity journal are here as well as a link to the video. I enjoyed listening to YouTube audio library of free music and sound bytes this month and compiled three small instrumental songs into one for my video. I also learned, after 3 tries to get it right, to add a link to the end of the video to my Positivity Journal playlist. Rejoice with me! I completed Marsha Baker's 365 Day Doodle Challenge this month! I also added in a 2 page spread of my favorite illustrator/card-maker! Guess who? Why you guessed! ME No, not me silly. Mary Engelbreit, that's who! I also learned this month about another disabled artist named Maud Lewis. She's the Grandma Moses of Nova Scotia. Before I forget, I also added a photo of cutting letters from catalogs and packaging to glue to my journal and other projects. Hope you enjoy the vid! 
 ~~ <> @ <> ~ ~

NOVEMBER'S video is online. Whew! I had planned to get my November Positivity Journal video up in a timely manner the first week of December, but my husband shared the coronavirus with our son and I during the Thanksgiving holidays. They got over it quickly, but it's still hanging with me, so not only did I not get November's up nor December's nor did I get all my planned projects completed, but hope you will watch what I do have for you. By the way, I'm grateful to be alive! I have had two visits to the ER, an overnight hospital stay because the doctors discovered blood clots in my lungs and two secondary infections as well as a positive COVID test. I also need a new c-pap, for my old machine is wearing out. If you pray, please remind God of my needs. Thank you!
 ~~ <> @ <> ~ ~

DECEMBER'S video is uploaded to YouTube! 2020 = The End!