Showing posts with label Pocket Letter. Show all posts

Sunday, November 8, 2015

Sharing Handmade Kindness Challenge

-- Week One --
Sharing Handmade Kindness: Family and Friends

I have joined Jennifer McGuire's "Sharing Handmade Kindness" Challenge
for the month of November. 


I watched a video by Shannon Green called Journaling by 5's that I used to make this ATC and Roladex card, which was made for all my ATC club friends.
 
 
I did not necessarily follow Shannon Green's timeline, however, these came together quick as I applied her formula to make the atc (November ATC club theme: Architecture).
 
a. Color background = I used watercolor paint by Art Quest and a wide water brush.
b. Collaged recycled bits of paper = I tore up bits of security paper envelopes. I love the patterns and added them to the dried rolodex cards with gel medium. After it was dry I sanded the rough texture of the gel medium to make it smooth.
c. Use stamps or stencils = actually  I sponged through a plastic number mask and stamped the flowers and leaves in red and black stazon inks.
d. Then add images and/or words = I stamped the cottage, the extra flower and the sentiment, colored them, cut them out, and glued them down to the cards. I added the address label to the rolodex card and the sentiment strip to the atc.
e. Then use  a pen/pencil and other things to enhance the card. In this case, I used a black colored pencil to trace around the address label and sentiment, added the tabs, washi tape, and the gem.
~~~~~
-- Week Two --
Sharing Handmade Kindness Theme: Community
 
I broke out the small gelli plate for the very first time
and made a pocket letter for an exchange.
Here's one of the cards =
 
I also made two thank you cards, one for my pastor and one for a friend who has donated a copy of his published cemetery book to our local genealogical library center.
I made it based on this design, click here.
 
 
I did not have the kit mentioned in the video, however, I cased a similar copy with eight accordion folded panels by cutting down 2 sheets of 8.5" x 11" pieces
of cardstock in half lengthwise
and taping three of the halves together to make one long strip of paper.
Next, I scored it about every 2.5" to 3" for every panel until I had 8 panels.
Whatever was left over was cut off.
I then stamped four different background stamps on 2 panels each and glued foam letters
to the center of each design until I spelled out the word T-H-A-N-K-S.
On the back of the end panel, I stamped a "thank you" in the center back
and signed it.
It looks nice standing up!
~~~~~
LOVE IT!
 I have to tell about our Pastor's elementary children. They made something handmade with their mother and handed small plates of it out this morning to people as they left church.
They were the yummiest chocolate chip cookies!
They were sharing handmade kindness today too with their community!
~~~~~
-- Week Three --
Sharing Handmade Kindness: Kids
 
This is what I made!
 
A pocket letter (I have one more to make) and several small hand games for the kids in my church. I gave the small tic-tac-toe games (found the game pieces at our local odd-ball salvage store called Bargain Factory. I think there is a link to it over on the side menu)
 to our church's candy lady for her yummy bag
 and the pocket letters will go as a card shower to two kids who are battling cancer.
I made the pocket letters like my rainy day puzzle,
except I left it in black and white so that the children
will have something to color if they feel up to it.
Having spent two weeks in the hospital myself a couple of summers ago,
even with TV, it's just plain boring, so
I can't even imagine spending a large part of my life there.
And just like an adult pocket letter, I have small things
appropriate for their age group inside each pocket.
If you are a crafter, consider joining us in making a card for the children
and/or their siblings and their parents. Jennifer McGuire has
posted the due date and rules on her blog post here.


And by the way, a niece shared this video with me today.
She's taking college classes and this is what she learned in her psychology class about 
the social pain of rejection from bullies.
It seemed appropriate to share it here.
She said she learned that the children's little saying
"Sticks and stones will break my bones, but names will never hurt me"
was false statement, because they both register in the same region of the
brain as pain
which is the body's way of saying that something is wrong and needs repair.
 
It reminded me of several Bible verses such these:
"Pleasant words are a honeycomb, sweet to the soul and healing to the bones."
~ Proverbs 16:24
"A cheerful heart is good medicine, but a crushed spirit dries up the bones."
~ Proverbs 17:22
" Therefore, as God's chosen people, holy and dearly loved, clothe yourselves with compassion, kindness. . ." ~ Colossians 3:12
~~~~~

-- Week Four --

Sharing Handmade Kindness: With Strangers
~~~~~
I didn't get to complete the Sharing Handmade Kindness Challenge
because the son shared his virus with his ole mom and dad,
so we were sick all through Thanksgiving weekend and I still can't seem the shake it,
however, just as I was getting ready to get off the internet a few minutes ago,
I saw that Katie Couric has written a news story on the Kind Campaign.
That's kinda exciting! Click here to see the video and her news article!
I have a craft that I made for my Sunday School kids several years ago,
that as soon as I can retrieve it from the craft barn and get it scanned,
I will upload it here. It goes very well with the theme!


Remember the wooden carpenters extension rulers that folded up?
Well this is based on that design.
You will need eight (8) bright yellow atc-sized cardstock cards (2.5" x 3.5"),
a hole punch, seven (7) large brads, a black marker and a yard-stick.
In the two end pieces, on the short sides, punch one hole. In the rest of the pieces, punch a hole  on each short side. With the marker and straight-edge, mark a line on on long edge, making sure each card cooresponds with the other.
Starting at one end, place each piece over the top of each other, like fallen dominoes. Line up holes & place brads. Remember, you will want slide atc's together like the wooden ruler.
Then using the yardstick, make lines on this golden ruler to correspond
with the inches on the yardstick.
Below that, add the words, evenly spacing the words across the "ruler:"
 
"Do to others as you would have them do to you." Luke 6:31.


Friday, September 25, 2015

My First 30-Day Color Challenge


Kathy Racoosin at The Daily Marker blog is about ready for another 30 Day Coloring Challenge and I think I'm going to join in since I did so well with my paper challenge, however, that means I'm gonna have to get crackin' cause I only have five days to make up a bunch of cards, one for each day of the challenge.
 
I don't have to do anything fancy, but since I need to practice my coloring skills, this challenge is right up my alley, so to speak!  I could even go out and get one of those new adult coloring books that's so popular right now, but why do that when I have the rubber stamps and ink to make my own coloring cards. Spending 10 minutes or so coloring everyday won't be too hard.
 
Most of what I saw at Kathy's blog from previous challenges were black and white images that she colored in. Some had backgrounds that looked like she had doodled lines reminiscent of zentangle.

Here's a video on how Kathy prepares for her challenge by organizing her supplies!

Day 1:
For Kathy's "Day One" card of the 30-day-Coloring-Challenge, click here. 
 
Good day for cleaning the craft barn and coloring!
This doodled digi came from Stephanie Ackerman which I colored and made into a card.
I definitely can tell I need a white gel pen!  
You can't see it, but I used a silver & tangerine gel pen to give it a little shine.
 And while I was at it, I made this color swatch ring for my coloring pencils.
Got the idea from Jennifer McGuire.
It was good to see what each pencil's color really was
 and I plan to use it for dark, medium, & light colors. 
(there is one brand I won't buy again, because it barely has any pigment).
~~~~~
Day 2:
Kathy's cards
I was inspired by Lindsay Weinrich's zentangle picture, however,
this is a combination of Mary Engelbreit and Stampin' Up rubber stamps
and my doodling, which I made into a card to color.
My mother was a ceramic teacher turned watercolor artist
and I remembered today as I was coloring about a painting technique
she taught me in ceramic class called crosshatching.
When you can't get a good covering of color,
go back over it in the opposite direction, which I did on the sky.
Today I worked some more on the colored pencil swatch strips
and discovered I had a white pencil, so that's the "stitches" on the black cardstock around the edge. Today was a good day for crock-pot cooking, so hubby had sloppy Joes for supper.
~~~~~
Day 3:
 [Today: Errand Day & Calling on Besties Day]
 
Dollar Tree had this cute care bear coloring book that hubby bought for me. . .
After explaining about the coloring challenge to our friends,
I went to work on one of the pages. . .
A reminder of good times!
~~~~~
Day 4:
Cards by Kathy 
 
Before Sunday School, Hubbin went to emergency room in excruciating pain;
yep, a kidney stone!
~~~~~
Day 5:
Dedicated to the memory of my friend, Linda!
 ~~~~~
Day 6:
 
Hubbin was released from the hospital today 
and immediately he made a beeline for his own bed!
 
As I've been coloring with my dry colored pencils,
I've been watching how I stroke the pencil line.
It's kinda like coloring with wax crayons, but lighter,
so if I want a smooth layer of color, I have to go over it at least three times.
With the bear tonight, first I put on a light blue, then hit the shadows with a darker blue
like I've seen in several copic marker videos that I've been watching on Youtube.
Then I went back over it in the opposite direction (cross-hatch) with the same light blue.
Since the bear is the focal point on this page, I went around it
with a halo of silver grey pencil to pop it from the page
and then used pencil strokes to radiate outwards from him.
Yesterdays bear got a doodled black fine line sharpie pen "scalloped" frame.
If you click on the photos, you can see the strokes better.

The Colored Pencil Artist's Drawing Bible. By Jane Strother. Chartwell, NY, 2012.
I dug this out of my stash of craft books to read.
It has techniques for both dry and wet coloring pencils.
~~~~~
Day 7:
 
Found this idea on one of my Pinterest boards.
Chrissie Grace called it "Kaleidoscope Painting" as she did it with acrylic paint
 (jar lid circles) & watercolors,
however, it reminded me of the colorblock background technique.
Guess that's why it interested me.
I traced around a juice can lid with a sharpie marker on a clipboard "table",
then colored it in with my colored pencils,
crosshatching about 3 coats of color on each space.
Since the sharpie lines looked faded, after all that,
I went back over the lines with the sharpie freehand.
I think this would make a great pocket letter
as it is on copyweight paper.
~~~~~
Day 8:
 
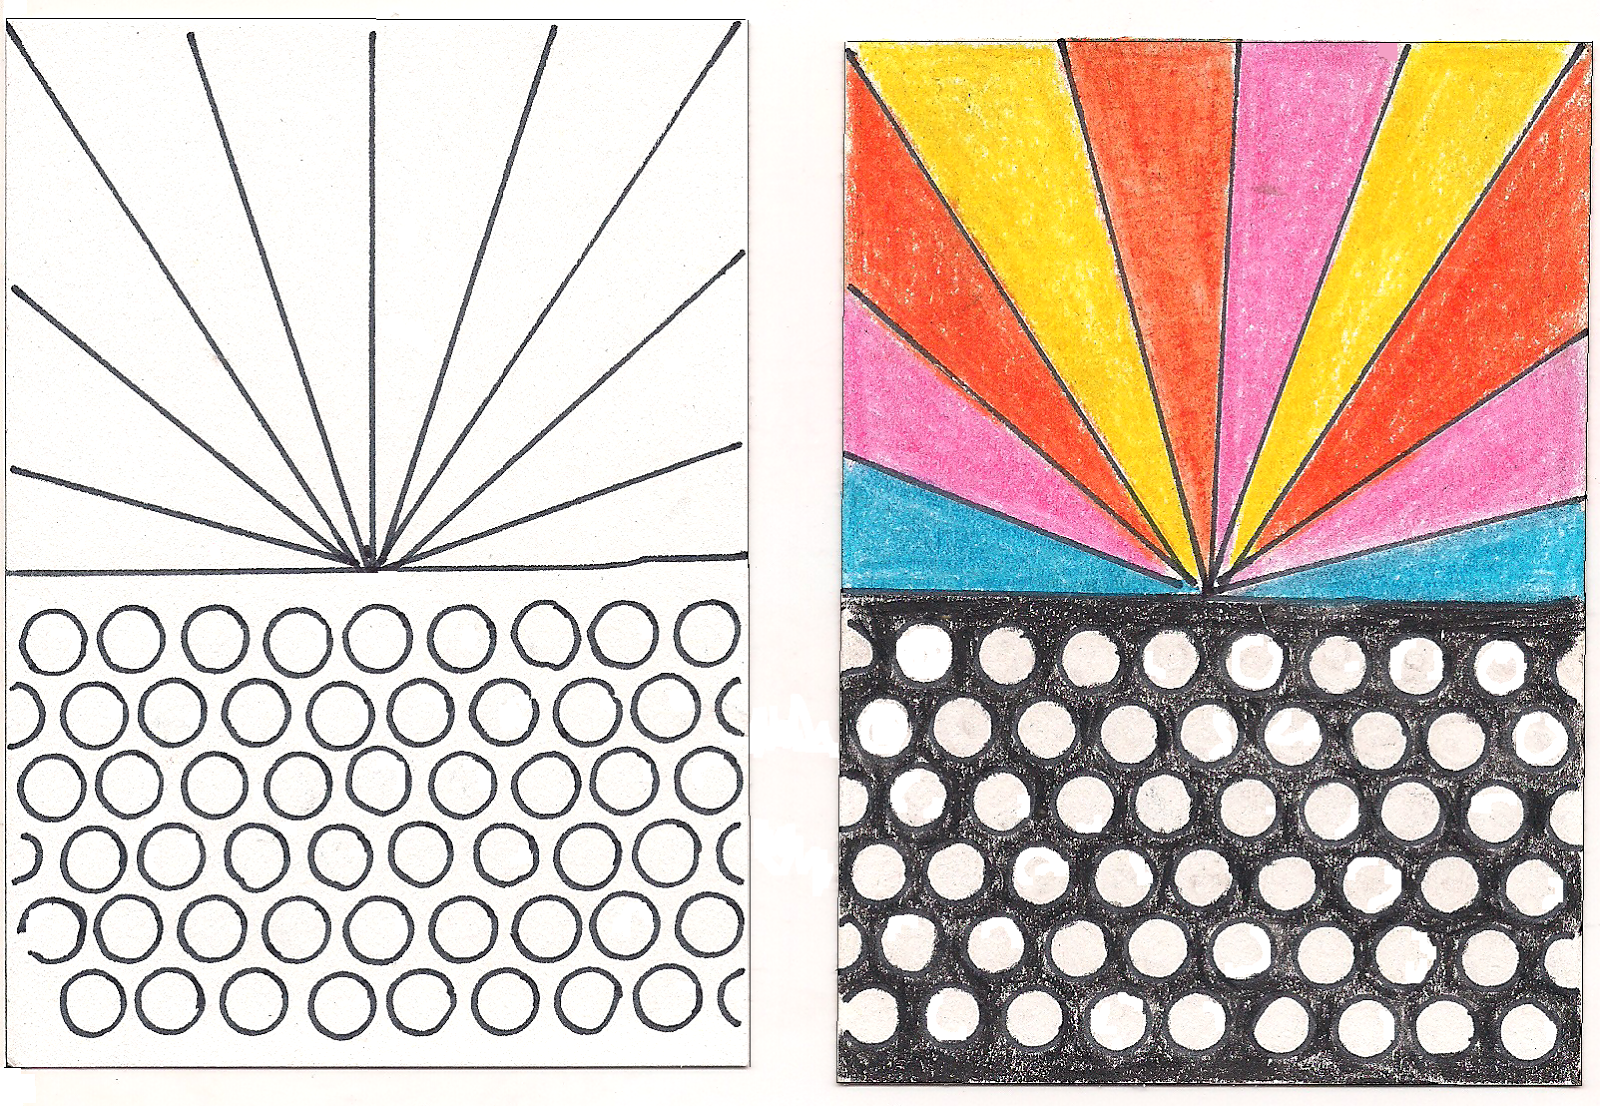
Next Sunday, Oct. 11 is
ATC Club meeting. Theme is : "Circus"
and rather than doubling up on projects, I thought I would include it
in the 30-Day Coloring Challenge. I usually make a dozen cards
and wanted to make the scrapbook paper
starburst technique that's all the rage right now,
but that doesn't include coloring, so. . .
And since I don't do dot placement well, I used a piece of sequin waste
as a stencil to draw in the dots, however, I discovered I
needed a really sharp coloring pencil to color round the tiny circles - *smile*
I found a couple of videos on Youtube for coloring with pencils --
one with Shari Carroll (flower)and the other Jackie Jones (pumpkins). 
~~~~~
Day 9:
 
Car quit. If I had only known that I would be sitting on a highway exit ramp,
Wal-Mart parking lot and at a garage for several hours this afternoon,
I would have taken my craft bag with me.
 
This Mary Engelbreit jester rubber stamp will be fussy cut
and added to Day 8's background as a circus clown.
~~~~~
Day 10:
 
Finished ATCs.
It's as circus-y as it's going to get.
~~~~~
See my 2nd ten days of coloring projects during this 30-Day Coloring Challenge.

Sunday, May 17, 2015

Scrapbooks and Steampunk

Have you ever wondered who invented self-pasting scrapbooks? Well, wonder no more. They were invented by Mark Twain, the author of Tom Sawyer, Huckleberry Finn, Connecticut Yankee in King Arthur's Court, and the Prince and the Pauper, among other books.
 
Mark Twain was tired of making scrapbooks with pots of glue, according the Mark Twain museum in Hannibal, Missouri. He pictured a scrapbook with glue already on the page, ready to moisten and use. He developed this idea and applied for a patent.
 
On June 24, 1873, he received his patent for "Improvement in Scrapbooks." He then took his idea to a firm that began producing "Mark Twain's Patent Self-Pasting Scrapbooks."
 
The scrapbooks were sold in more than 30 sizes and models, from pocket size to ones that would hold almost a half of a newspaper page. Specialist books were developed for druggists to hold prescriptions, as well as other organizations.
 
Of Mark Twain's three patents, this one made a profit. In 1877, about 25,000 scrapbooks sold.
 
Hannibal, MO. had their first Steampunk Festival last year and had more interest than expected with approximately 1000 people showing up.  This years festival will be September 5-7, 2015. I purchased my first piece of steampunk jewelry today in Hannibal's Historic Museum.
 
I've got my thinking cap on -- I want to challenge myself to come up with an ATC or pocket letter with an antebellum/Border War/Civil War images. Do I have any rubber stamps with images that will suit? Will have to dig in the ole craft barn collection. 
 
And, I've been collecting miniature items from thrift stores to make a fairy garden. I have quite a few images/ideas pinned to my miniature Pinterest board "Miniature Scenes." I think I've changed my mind about the fairy garden. I think I want to make a diorama instead with a large glass fish aquarium. In the Hannibal museum, they had 10 dioramas of scenes behind glass from Mark Twain's novel "Tom Sawyer" right in a row. Pretty cool if you ask me!

Wednesday, April 15, 2015

Rainy Day Puzzle


Rainy Day Puzzle
By Dolores J. Rush.
 
Here's a little activity to keep your children busy on those days when they are bored and have nothing to do! Please supervise children when using the paper trimmers' cutting blade.
 
Supplies:
  • Daisy stamp #440D99 from Stampcraft
  • Dot Design #B2964 from Hero Arts
  • Dot stamp from Stamps by Judith
  • Outline stamp of Wildflower Duet #Z944E from Posh Impressions
  • Outline stamp of Flower Duet #4555S from Posh Impressions
  • Outline stamp of Rose Duet #4528S from Posh Impressions
  • Inks, markers from Stampin' Up!
  • Paper Trimmer with scoring & cutting blades from Fiskars
Instructions:

1. Insert scoring blade into paper trimmer. Score paper lengthwise at 2 1/2 inches across paper & then at 5 inches. Remove scoring blade, insert cutting blade and push paper to 7 1/2 inches and trim strip off.

2. Change back to scoring blade and turn paper 90 degrees. Insert paper into trimmer and score at 3 1/2 inches, then at 7 inches. Change blades and cut off at 10 1/2 inches. You have scored 9 ATC size rectangles.

3. Optional: at this time, you may turn sheet over and lightly pencil numbers in centers. Turn back over.

4. Ink up each stamp with black and center stamp evenly over score lines. Do not stamp off edges as they will be stamped later. Stamp randomly at least 3 times with each floral stamp, more if you have room. Ink up dot design stamp with two colored inks and stamp in centers of rectangles. Finish with Judith Dots in black.

5. Insert cardstock into trimmer and cut first scoring line on the right. Lift cut piece straight up off trimmer and lay to the left of cardstock. Slide uncut piece out and butt edges together. Stamp over cut edges, holding strips together, as you did over score lines.

6. Turn all pieces of cardstock to the right and repeat step five. You may color in flowers at this time.

7. Finish cutting out rectangles along score lines and mix up pieces. See if you can put the puzzle together without looking at your placement numbers. Enjoy!